
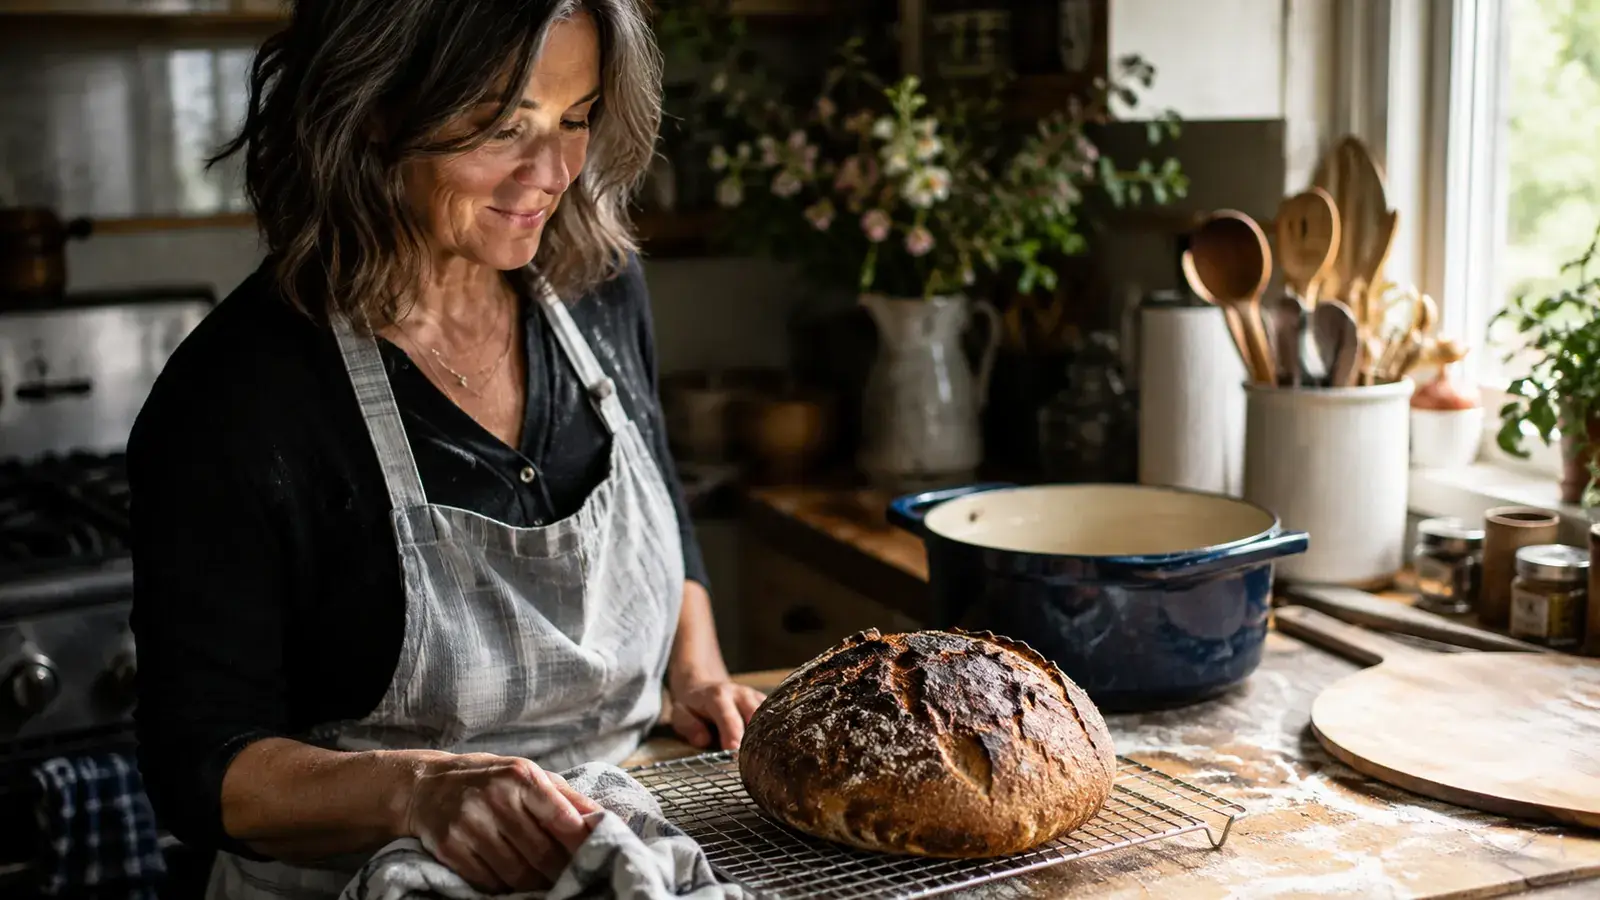
I baked bad bread for about four years before I figured out what was actually missing. Good flour, decent yeast, a reasonable oven, and every loaf still came out with a crust like a saltine and a crumb like a dinner roll. Then a neighbor handed me a loaf she'd baked in her Lodge Dutch oven and it had that blistered, dark, crackling crust you get at an actual bakery. Same flour I was using. Same oven temperature. The only difference was the pot.
What a covered Dutch oven does is trap the steam the dough itself releases as it bakes. That steam keeps the crust soft just long enough for the loaf to expand fully in the oven, what bakers call oven spring, before the crust sets and starts to caramelize. Professional bread ovens do this with injected steam jets. At home, a heavy lidded pot does the same job for the price of one piece of cookware you'll also use for chili, pot roast, and everything else. I use the 6-quart Lodge enameled Dutch oven for this specifically because the lid seals tight and the enamel coating handles a 500 degree preheat without flaking, which matters more than people think when you're about to lower dough into a pot that's been sitting in a hot oven for 45 minutes.
For a long time I assumed the crust I wanted required a wood-fired oven or a bakery-grade steam injection system, neither of which fits in a normal kitchen. What actually changed everything was realizing the mechanism is simple. Steam plus high heat plus a controlled release. A Dutch oven gives you all three without a single piece of specialty equipment beyond the pot itself, which is why this method spread through home baking forums the way it did. It's not a trick. It's just physics you can use on a Tuesday.
This walkthrough is the exact process I use for a basic no-knead style crusty round, start to finish, including the two mistakes that wreck most first attempts. If you want the full story of how I landed on this specific pot, I wrote about it separately in my honest review of the Lodge Dutch oven after about a year of near-weekly use.
The pot that makes the crust happen
You don't need a premium French oven for this. The Lodge 6-quart enameled Dutch oven holds heat evenly, seals tight enough to trap steam, and handles the preheat without any drama. It's the pot I reach for every time I bake this loaf.
Amazon Check Today's Price on Amazon →Step 1: Mix the dough the night before
I use a wet, low-effort dough because it's forgiving and it's what actually produces that open, holey crumb. In a large bowl, stir together 3 cups of bread flour, 1 and 3/4 teaspoons of salt, and 1/2 teaspoon of instant yeast. Add 1 and 1/2 cups of room temperature water and stir with a wooden spoon or your hand until there's no dry flour left. It will look shaggy and a little wet, not smooth. That's correct. Don't knead it.
Cover the bowl with a plate or plastic wrap and leave it on the counter for 12 to 18 hours. I mix mine around 8pm and bake the next morning around noon, which lands right in that window. The long, slow rise at room temperature is doing the work kneading would normally do, it's developing gluten structure through time instead of muscle. In summer my kitchen runs warm and the dough is ready closer to 12 hours. In winter I've let it go the full 18 without any issue.
Bread flour gives you the strongest structure because of its higher protein content, but I've made this with plain all-purpose flour plenty of times when that's what was in the pantry. The loaf comes out slightly less chewy and a touch less airy, but it's still a real crusty loaf, not a failure. What matters more than the exact flour is the salt. Don't skip it or eyeball it low, salt is doing real work slowing the yeast down over that long rise, not just seasoning the bread.
Step 2: Shape it and let it rest again
The next day the dough should be full of bubbles on the surface and roughly doubled, with a loose, webby look when you pull the plate back. Turn it out onto a well-floured counter. It will be sticky, so don't be shy with the flour underneath and on your hands. Fold the edges into the middle a few times to form a rough ball, then flip it seam-side down.
Set the dough ball on a large square of parchment paper, cover it loosely with a towel, and let it rest another 1 to 2 hours while your oven preheats. This second rest is what gives you the oven spring, the dramatic rise that happens in the first 15 minutes of baking. Skip it and the loaf bakes up dense and flat no matter how good your pot is.
Around the 45-minute mark of that rest, put your Lodge Dutch oven, lid on, into the oven and preheat to 500 degrees. Yes, the empty pot goes in dry and heats up alongside the oven. That's the step people skip because it feels wasteful, and it's the single biggest reason first loaves come out pale and flat instead of dark and blistered.
Step 3: Score it and load it hot
Once your dough has rested and the oven and pot have preheated for a full 30 minutes at 500 degrees, dust the top of the dough with flour and use a sharp knife or a razor blade to slash a shallow X or single line across the top, about half an inch deep. This gives the loaf a controlled place to expand instead of splitting wherever it wants.
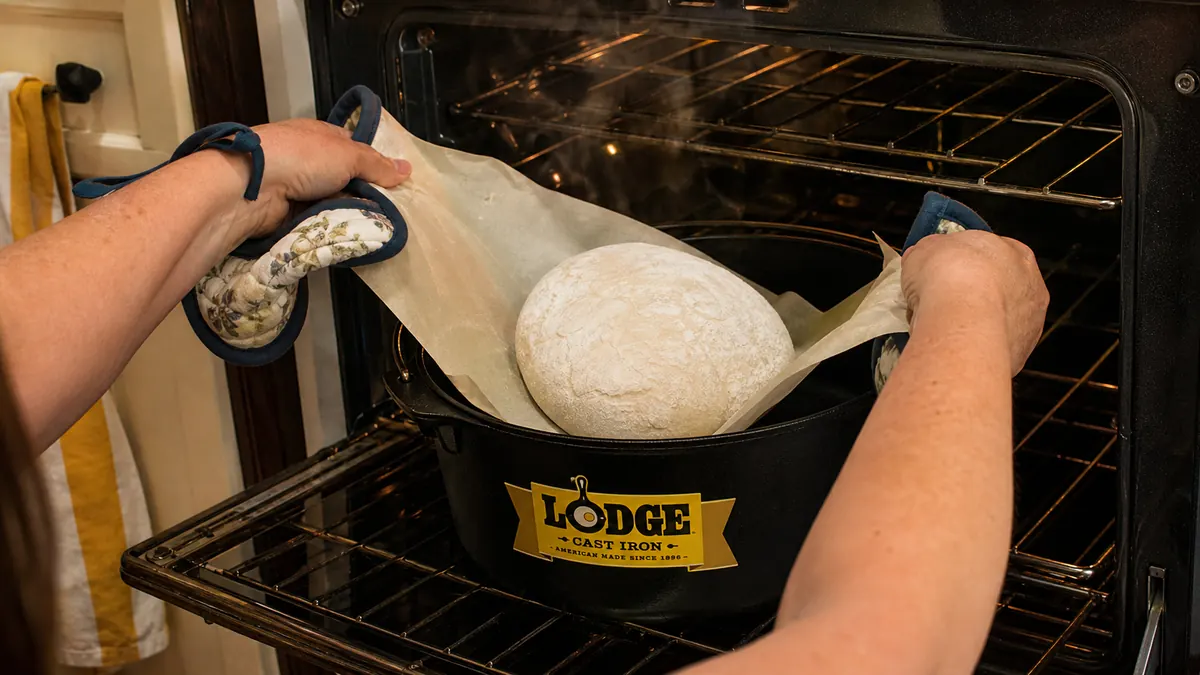
Carefully pull the hot Dutch oven out using thick oven mitts, take the lid off, and using the parchment paper as a sling, lower the dough straight down into the pot. The pot will be somewhere near 500 degrees, so move with purpose and keep your hands well clear of the enamel walls. Put the lid back on immediately and get it into the oven fast, you're trying to lose as little heat as possible in the transfer.
A wetter dough scores less cleanly than a stiff one, so don't expect a bakery-sharp line the first few times. A slightly ragged score still works, the goal is just giving steam and expansion somewhere predictable to go. If the dough sticks to your blade, dip it in water between cuts. It sounds fussy but it's a five-second habit that saves you from dragging and deflating the top of the loaf right before it goes into the hottest part of the whole bake.
Step 4: Bake covered, then uncovered
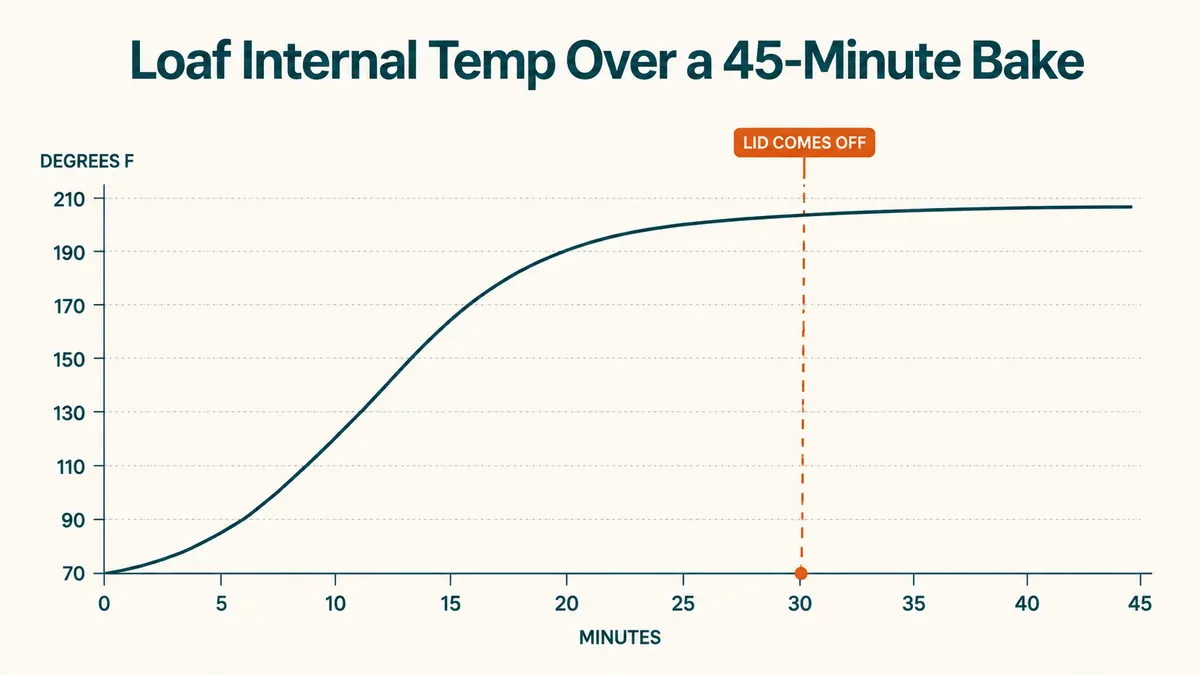
Drop the oven temperature to 450 degrees once the pot is in, and bake covered for 30 minutes. During this stretch the lid is trapping the steam coming off the dough, keeping the crust pliable while the loaf pushes upward and outward. This is the part a regular sheet pan can't replicate, there's nothing holding that moisture against the bread.
After 30 minutes, carefully remove the lid and bake another 12 to 18 minutes uncovered. This is where the crust actually browns and blisters, once the steam has done its job and the surface is free to dry out and caramelize. You're looking for a deep mahogany color, not golden tan. If it looks done at golden tan, it isn't, that's an underbaked crust that will go soft again as it cools.
If you own an instant-read thermometer, this is the one place I'd actually use it instead of trusting color alone. The loaf is done around 205 to 210 degrees at the center. I don't check every time anymore, but I did for the first ten loaves or so, and it's the fastest way to build a reliable feel for what done actually looks like in your specific oven, since every oven runs a little differently.
Step 5: Let it cool before you cut it
Pull the Lodge pot out, lift the loaf onto a wire rack using the parchment, and walk away for at least an hour. I know how hard this is. The bread smells incredible and the crust is crackling audibly as it cools, which is a real sound, not something I'm inventing to make this sound more romantic than it is. But the interior is still cooking and setting as it cools. Cut into it now and you'll get a gummy, wet crumb even though the loaf was fully baked.
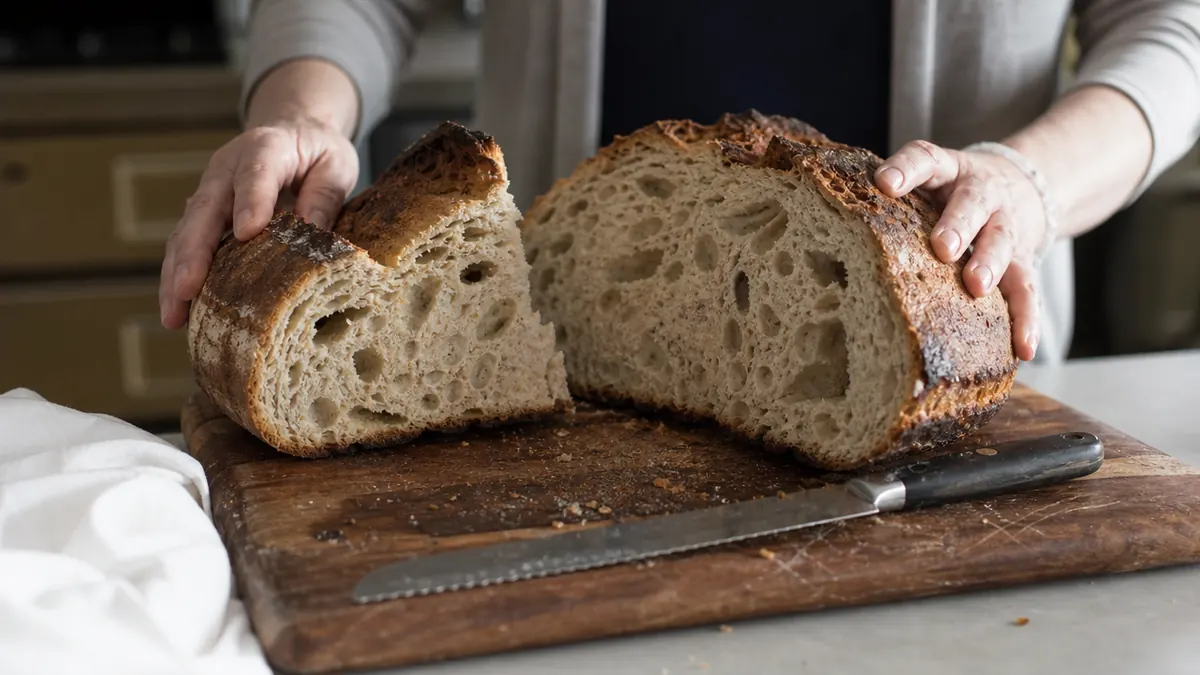
A fully cooled loaf slices clean, holds its structure, and has that open, irregular crumb with actual air pockets in it, not the tight uniform crumb of a sandwich loaf. My most reliable proof it worked is my husband coming in from the garage asking what smells like a bakery, then getting annoyed when I tell him it's not ready to cut yet.
The lid isn't optional and the cooling time isn't optional. Skip either one and you've made a decent flat loaf instead of the bread you were picturing.
What Else Helps
A kitchen scale makes this far more consistent than measuring cups, flour especially varies a lot by how it's scooped. If you bake this more than occasionally, weighing your flour and water will fix more inconsistent-loaf problems than any technique change. A bread lame or a plain razor blade gives a cleaner score than a kitchen knife, which tends to drag and deflate the dough instead of slicing it. And a second smaller Dutch oven is genuinely useful if you ever want to bake two loaves for a gathering, since running the big Lodge pot twice back to back means reheating it fully between bakes, which eats another 30 minutes you probably don't have. I go into more of the specific reasons this method beats a regular loaf pan in this rundown of what actually changes when you switch to Dutch oven baking, including a few things I didn't expect, like how much less the loaf sticks compared to a nonstick pan.
Cleanup on the Lodge pot is easier than people expect, given what it just went through. Baked-on flour and a little scorched cornmeal on the bottom soak loose in warm soapy water in a few minutes, no scrubbing pad required if you let it sit. I do wipe the enamel dry right after washing rather than air-drying it, mostly out of habit from other cast iron pieces, though the enamel coating itself doesn't need seasoning the way bare cast iron does. After close to a hundred loaves the interior still looks close to new, no staining, no dulling.
The two mistakes I see most from people trying this for the first time. First, not preheating the pot itself, just the oven. The pot needs the full 30 minutes at temperature or your first 10 minutes of baking are spent heating cold enamel instead of baking bread, and you lose most of your oven spring. Second, cutting too early. If your crust looked amazing and your crumb came out gummy, that's cooling time, not technique. Give it the full hour next time before you touch it with a knife.
Same pot, better crust, every time
This whole method depends on a pot that seals well and holds even heat through a 500 degree preheat. The Lodge enameled Dutch oven has done that for me on close to a hundred loaves now without a crack or a warped lid.
Amazon Check Today's Price on Amazon →